
Let’s start with some brief history: the term Bullet journal (“BuJo” for short) has been around for about a decade (since 2013). It comes from Ryder Carroll, who described this organization system first on his website, then in his book The Bullet Journal Method (which I highly recommend, but if you don’t have the time to dive into a whole book, read on). In his book, Ryder Carroll recounts how he created this method to de-clutter his mind and help with his ADHD. His method gained traction online and bullet journaling became a community of its own. The popularity of bullet journaling peaked around 2018-2020, largely due to online creators sharing their – often aesthetic – bullet journal spreads on social media.
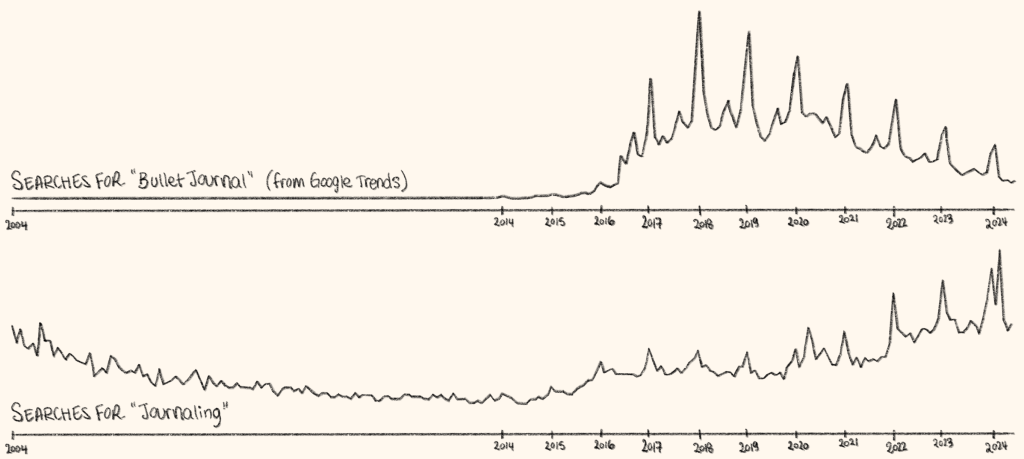
And while the popularity of bullet journaling has dwindled over the past few years, other types of journaling have become more prevalent. My impression is that the community has not become smaller, but that people are moving from the original bullet journal method to more personalized variants of journaling. I now own an excessive number of journals, and I incorporate aspects of the original bullet journal method in most of them. There’s also been endless debates online over whether certain (often more artistic) approaches can even be called “bullet journaling”. In my head, it all counts – the terminology is there to bring people with common interests together, not exclude anyone with their own take on it.
Ultimately, I think bullet journaling is a great place to start your journaling and planning journey, and whether or not you stick to the original method, there’s a lot you can take from it.
- The “original” Bullet Journal method
- The Tools of Bullet Journaling: Why use pen and paper?
- Bullet Journal Basics
- Beyond the Basics
- How to start a bullet journal?
The “original” Bullet Journal method
At its core, Bullet journaling is a system for personal organization, designed by Ryder Carroll around productivity and reflection. If you follow the original bullet journal framework, it will work like a continuous planner and a notebook. You have spreads to plan future events (ie. the future log and monthly log), spreads to log your daily to-dos and notes (the daily log), and spreads to take more in-depth notes on a specific topic (these are called “collections”). And rather than filling in pre-made pages like you would a planner, you make new spreads daily and fill up however many pages you need in your notebook that day.
The other advantage of the bullet journal system is that it encourages you to be mindful as you record your activities, goals, and tasks. A big part of this is taking the time to write your tasks with a pen and paper. We’ll get into this more in the next section.
If this sounds very different to you from the bullet journal content you’ve seen on social media, it’s because in its most basic form, it is. BUT if you take away anything from this post let it be this: while the bullet journal method provides a framework, it does not impose strict rules. In fact, the beauty of bullet journaling lies in its flexibility. This means that you can, and you should, adapt it to create a system that truly works for you, and can evolve with you.
Your bullet journal can be as minimalistic or as elaborate as you want. You can use your bullet journal strictly for productivity and planning, or you can also use it to track habits or hobbies, keep memories, reflect and practice gratitude, even transform it into a creative outlet. But before we talk about adapting your bullet journal to your needs or getting artistic, let’s start with the basics:
The Tools of Bullet Journaling:
Why use pen and paper?
If you want to start bullet journaling, all you need is a notebook and a pen. Any notebook, any pen. Whatever makes it easy to get started is right.

If you’re anything like me, then you love to collect new notebooks and you plan to grow your pen collection until you can be sure you’ve tried every single option out there. There’s a whole world of stationery that can turn journaling into a full-blown hobby. If that sounds like you, then I recommend you check out my favorite stationery items.
But if you’re trying this for the first time, don’t worry about getting lost in the whirlwind that is the stationery world – I recommend starting with any pen and notebook you have on hand.
The one thing that comes up a lot when I ask people about their planning systems is how much more convenient it is to use a digital calendar or planner app. But there’s a purpose to using an analog system for bullet journaling. I mentioned that mindfulness is a big principle of the bullet journal system, and sticking to pen and paper definitely plays into that – here’s how:
- Opening a journal means no distractions. There’s no other app to click on, no notifications to check, no clutter. An analog planner can be a sanctuary from the digital noise of our daily life, offering a space for calm, focused introspection.
- Opening your notebook and writing in it can form a ritual of sorts. Not only is it a calming way to start and reflect on your day, but it’s also a great way to create a routine and form new, productive habits.
- Lastly, taking the time to write things down by hand forces you to reflect on each item. This is a good opportunity to think about the purpose and importance of each item, and often helps stimulate new ideas. On the other hand, if an unfinished task is not worth the time it takes to write it down, is it worth keeping in your to-do list?
- Plus it’s nice to keep a physical copy of your journal to look back on and see how you’ve changed and progressed over the years.
A little note as you open up your new journal: don’t fall victim to perfectionism paralysis. Make that first mark – in fact, make a mistake right away so you can get over any blank page anxiety. In the next section, we’ll get into each of the basic spreads you can start with.
Bullet Journal Basics
The Index
The first spread in your bullet journal is typically the Index. This one is pretty self-explanatory: it serves as a table of contents that you update as you go along. It’ll help you keep track of your entries and quickly find what you’re looking for.
A little tip here: leave a couple of blank pages for this one so you don’t run out of space in your index. Alternatively, you can do what I do and start the index on the last page of your notebook instead, then flip the pages of the index backwards so you don’t have to guess how many you’ll need in advance.
The Future Log
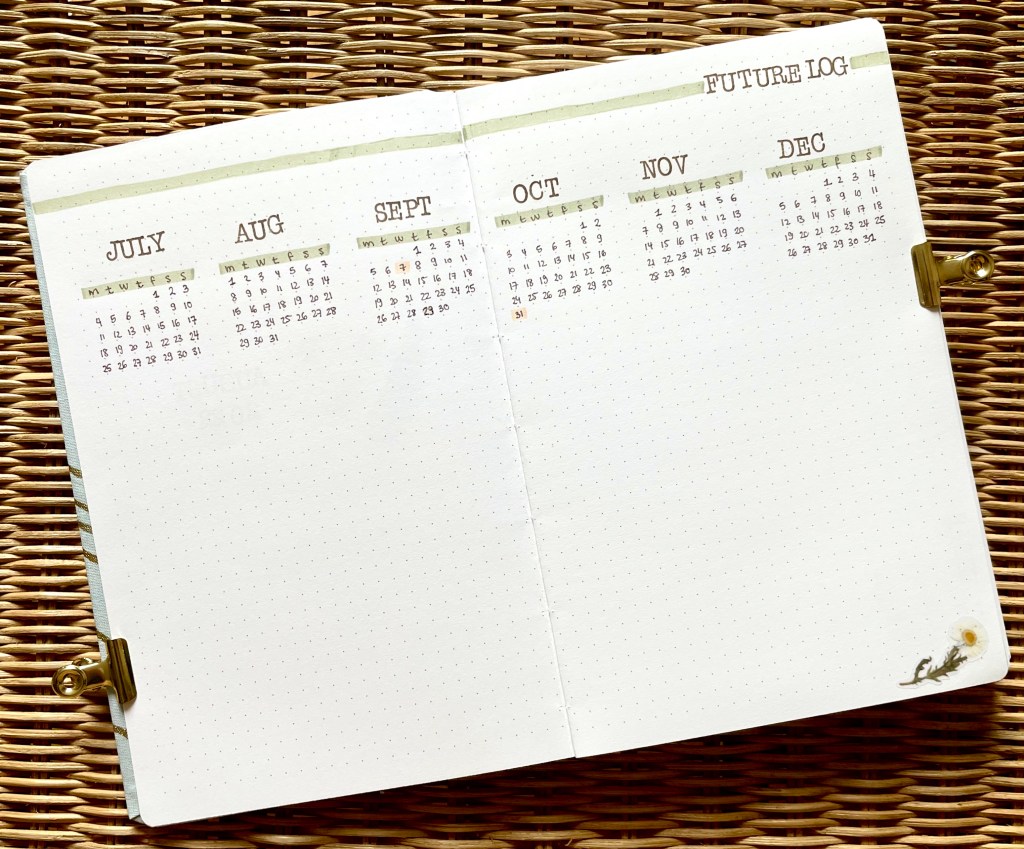
The second spread in a bullet journal is usually the Future log, where you can jot down upcoming events or later tasks. Because you are essentially filling out your journal one day at a time (as opposed to having pre-dated pages), this section provides a space for long-term planning and organization for the months to come.
The basic approach consists of splitting a two pages each into 3 horizontal sections, one per month, so you can plan ahead for the next 6 months. Of course, plenty of variations of this exist.
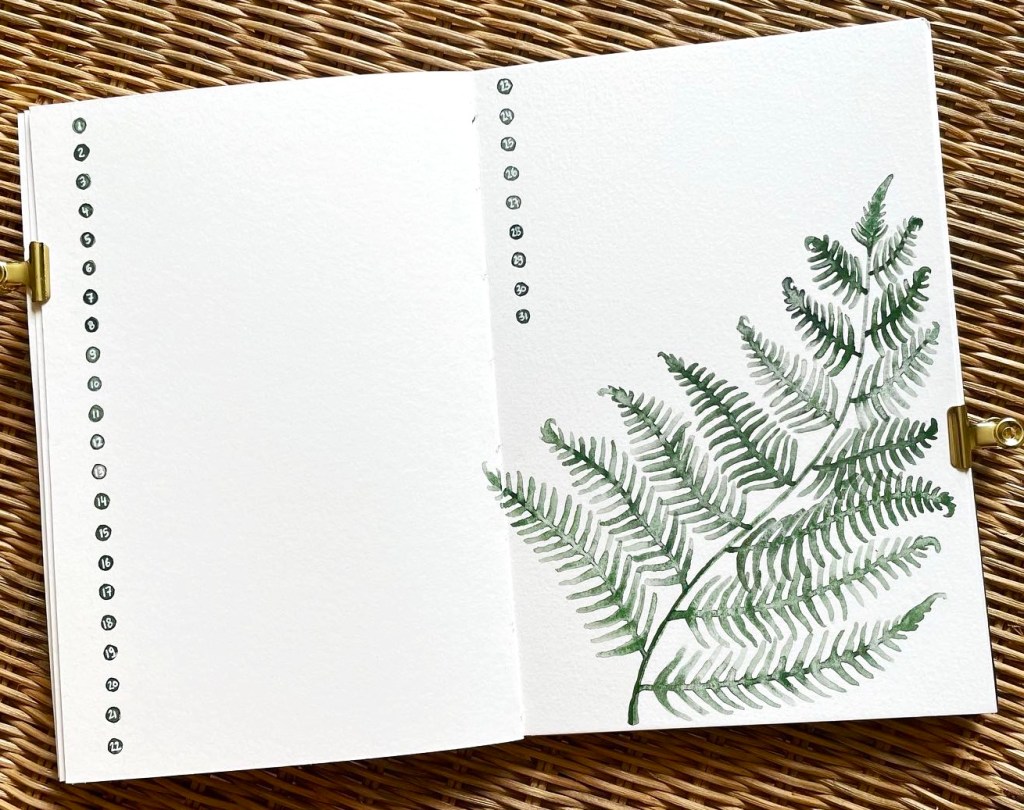
The Monthly Log
The Monthly log provides a full view of the current month, including key events, appointments, deadlines, and tasks at a glance.
There’s several ways to set up your monthly log. The simplest one is just a vertical list of every day in the month, giving you a full line to write major events for each day. An alternative layout is drawing out a large calendar view of the month. I find the calendar view is more practical as an overview of appointments or deadlines, but the vertical list is easier to set up and provides a little more space to write.

The Daily Log
The Daily log is where you’ll spend most of your time in your bullet journal. This is where each day you write down tasks, events, activities and notes – it effectively serves as an everyday to-do list and note space.

To distinguish between the different elements of the daily log, we you can follow a Key. The basic key uses a simple bullet point for tasks (hence the “bullet” journal). The bullet can then be modified depending on whether the task is completed (X), pushed back* to a following day (>), or cancelled (crossed out). In addition to tasks, you basic key uses dashes for notes, and empty circles for events. This of course, can be changed to whatever works for you.
*Transferring tasks that haven’t been completed to a later date is what people in the bullet journaling community call “migration”. The idea is that instead of feeling guilty or overwhelmed about tasks that haven’t been completed, you simply migrate them to the next appropriate day or month. The act of rewriting the tasks also forces you to reconsider its importance, and gives you a chance to de-clutter your list to focus on what truly matters.
Beyond the Basics
With the basics above, you should already be able to start bullet journaling for productivity. Then there’s a plethora of extra spreads you can add to enhance and customize your system. Here are the most common ones I’ve seen:
Collections
Collections are themed lists or notes you add to your journal as they come up. They are the easiest way to group related tasks and notes in a common spread that then gets referenced in your index. These could be anything from project-specific tasks, meeting notes, a list of books to read, workout routines, to travel plans. Really, the possibilities for what can go into a collection are endless.

I add a variety of different “notes” spreads in my own journal each month depending on what is happening in my life (some recent examples are trip planning, paint swatches, letter drafts, and wedding decor ideas). I also have recurring collections: the one I use most often is my monthly reading log.
Trackers
Bullet journal trackers are probably one of the most popular aspect of the system. These can be used to track habits, moods, water intake, social media followers, exercise, sleep and health patterns, book series, anything you want to stay on top of. It’s essentially a visual representation of your habits, which can not only help you understand your patterns better but also motivate you to achieve your goals. Trackers probably have the widest diversity of designs depending on their functions, too.
A warning: trackers might seem like a fun element to incorporate right away, but don’t overdo it. Too many trackers becomes impossible to keep up with, leading to guilt and demotivation, which defeats their purpose. Start by tracking one or two habits only. I found that there’s only 2 trackers I keep up with in my own journal, and these serve very specific purposes: a migraine tracker to record the frequency of my migraines, and a menstrual tracker. I create these trackers only once at the beginning of my journal, and use them throughout the year.
Bullet Journaling as a Creative Outlet
Bullet journaling became popular in large part because people started showing it as a creative outlet by adding doodles, art, stickers and collages to their journals. This adds a personal touch to the process and can make it more enjoyable and motivatig. One of the reasons I personally started journaling was to practice art, so I like to use monthly themes testing new media and creating aesthetic decor around my functional spreads. Of course, this is completely optional! But if the creative side of bullet journaling is something you’re into, check out my instagram, where I share my spreads every month.
How to start a bullet journal?
If you’re eager to try bullet journaling, here’s how I recommend you get started:
- Learn the basics. If you’ve made it this far, you’ve got that covered.
- Try the basics. I recommend trying out the bare minimum framework for at least a few weeks, just so you don’t get overwhelmed and discouraged before reaping the benefits of bullet journaling. Once you’ve gotten the hang of it,
- Reflect. What worked for you? What helped? What didn’t work? What do you like about the system? What can you change to fit your needs? Test out different formats or spreads.
- Little by little, try to incorporate new elements that serve your needs. Ie. If your primary goal is memory keeping, try adding a memory log or even photos to your journal each month. What motivates you to keep up the practice? Ie. If using stickers helps you stay on top of your tasks and save time, then add stickers to your supplies. If spending hours painting a cover page gets you excited to plan your week and doubles as practicing your hobby, then paint away! If, on the other hand, the idea of getting out your paintbrushes overwhelms you to the point where you haven’t touched your journal in months, try a more minimal appraoch. The goal is to find what works for you, and that might take some trial and error.
- Keep going. This is easier said than done, so I wrote a whole post on how to keep journaling consistently.
- Remember that as your life and needs change, so can your bullet journal. What works for you now might not work forever, so don’t be afraid to change things up.
